When is the Best Time to Plant flowering Perennials?
This is a question asked a lot this time of year. Tthe answer is simple, but not easy to follow.
The best time to plant is when the plant is able to put down roots quickly.
When do plants put down roots quickly? It depends on the plant and what it likes.
You have heard me say that there are cool weather loving plants and warm weather loving plants. This is true for perennials (plants that grow and flower year after year) as well as annuals (plants that grow and flower for one season).
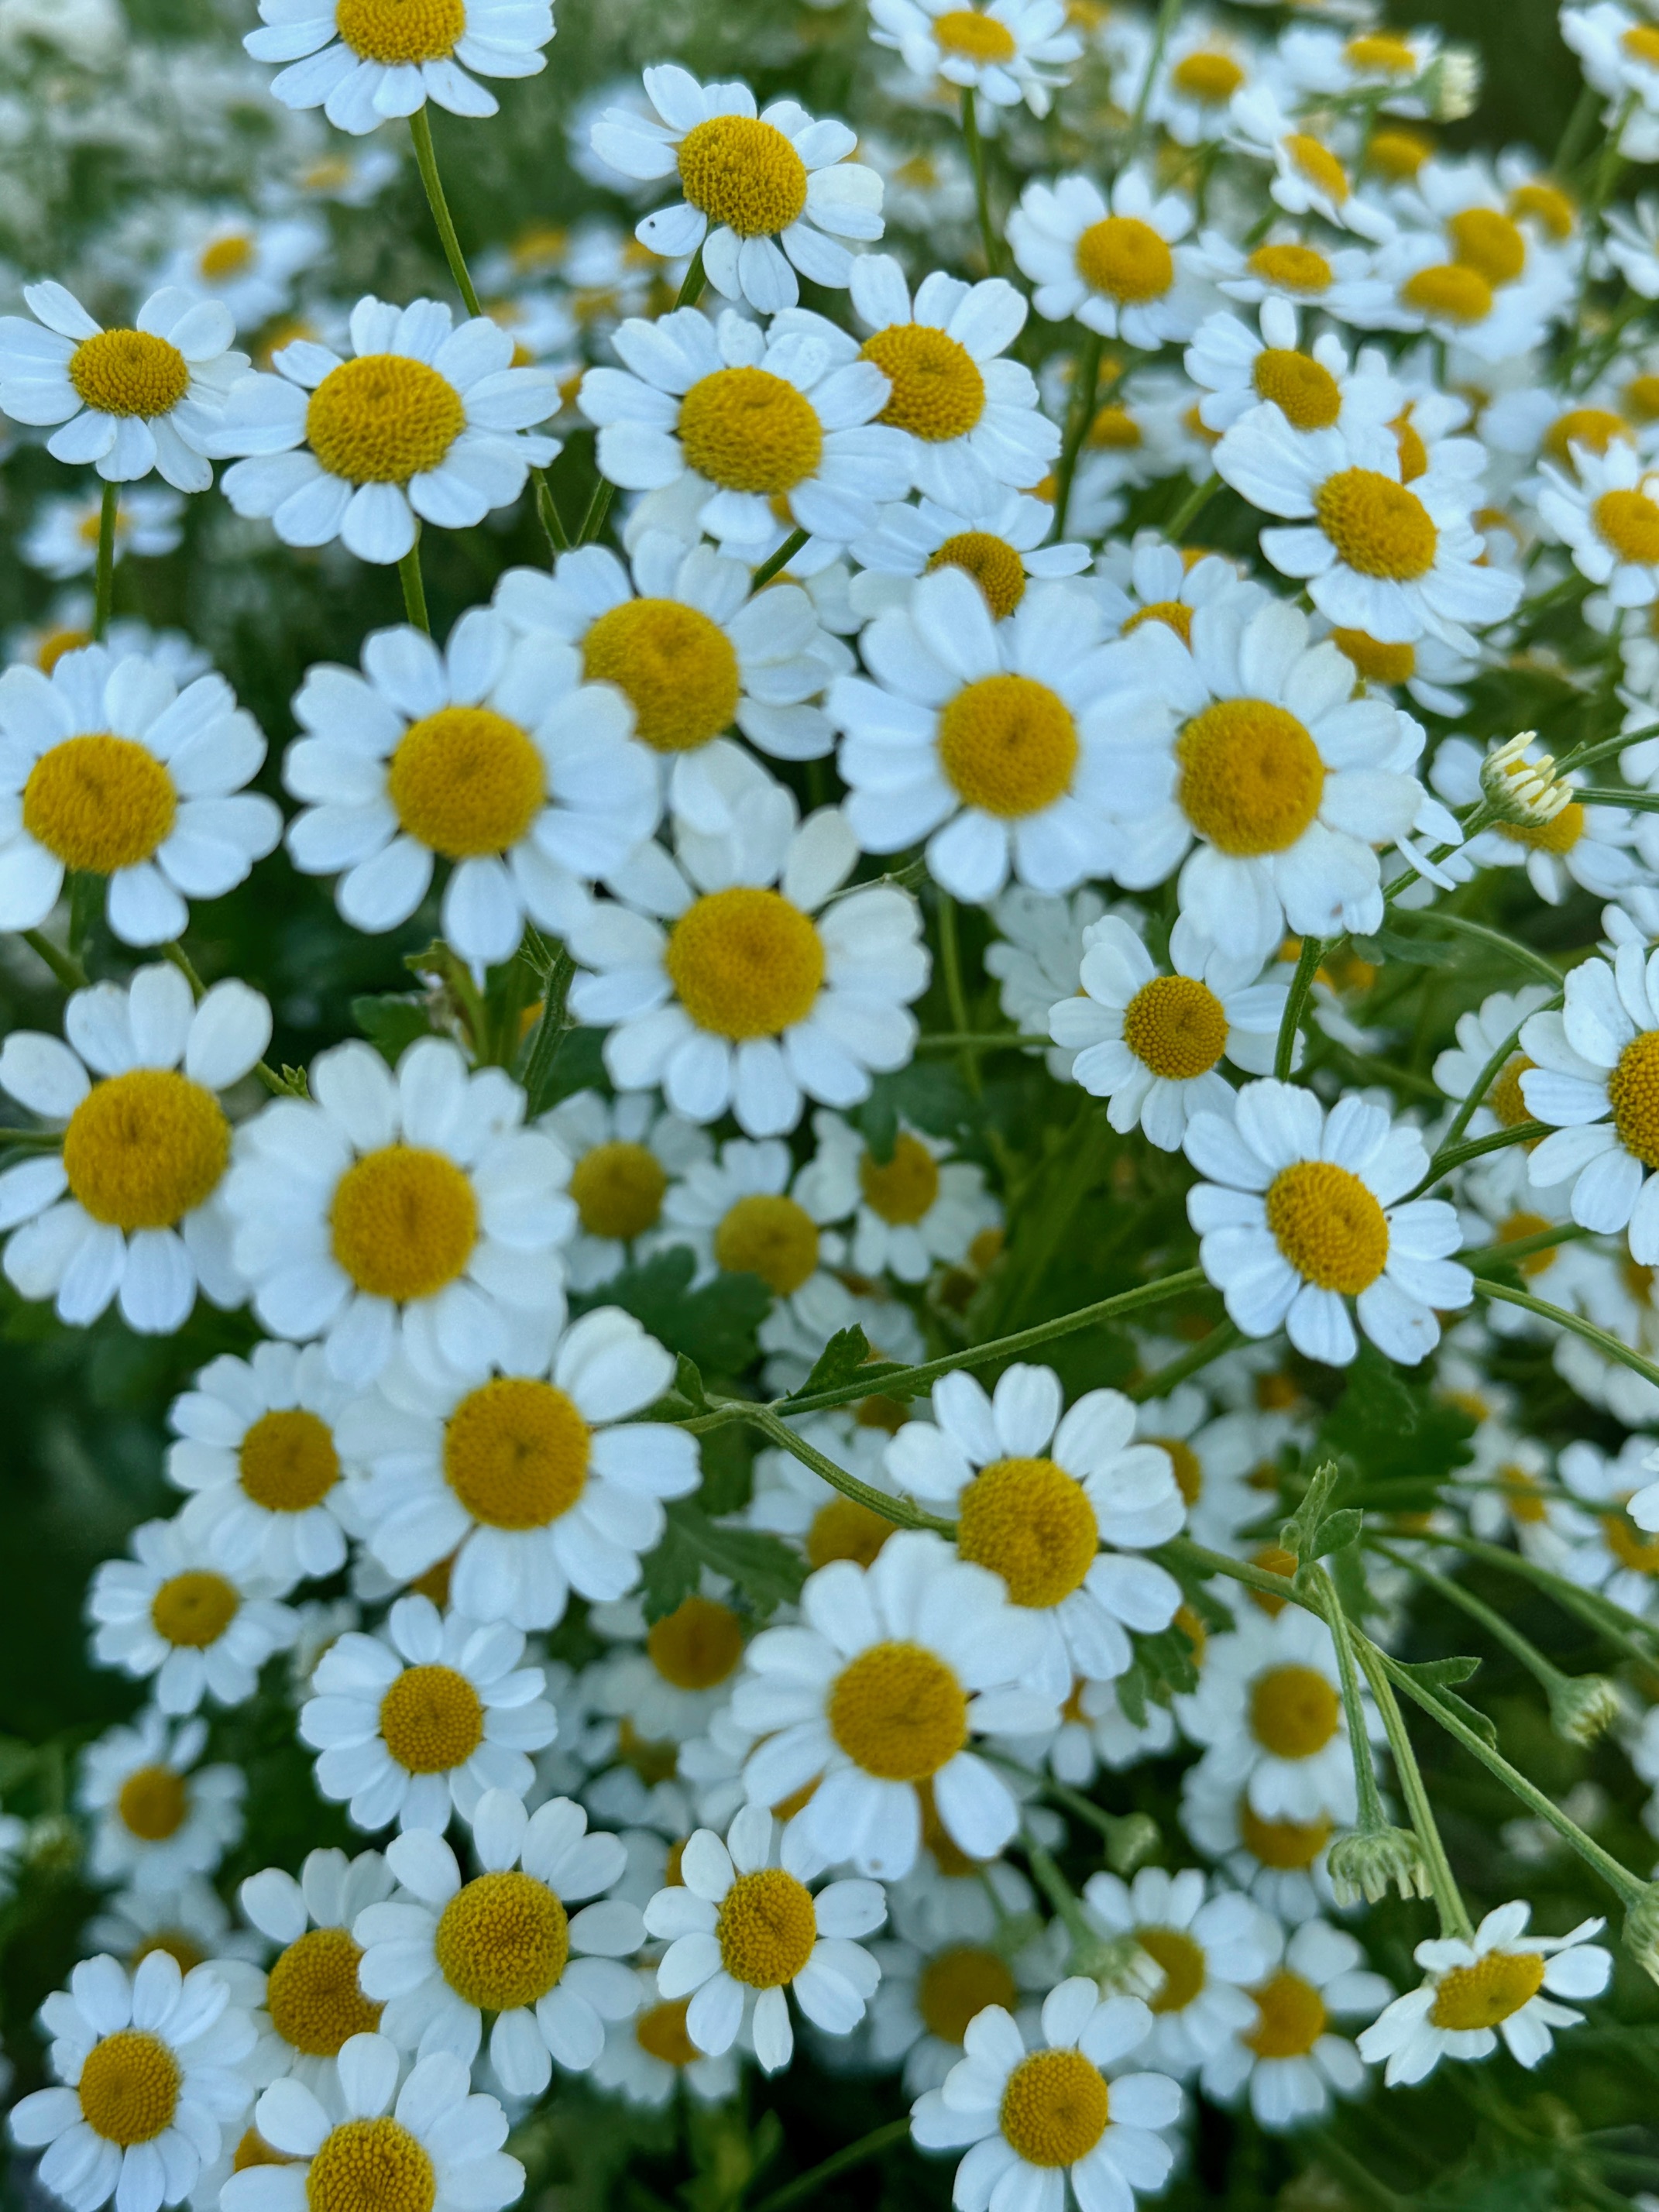
Let's first take the well known snapdragon. Many people have heard of it, seen it, and want to grow it. Maybe they have tried. Maybe they bought a seedling at a big box nursery and still it didn't perform the way they hoped.
Snapdragons are a great example of a cool weather loving flower. If you plant it after our last frost, you may get a bloom, but it won't thrive untili fall. If you plant that same snapdragon in April when the temperatures are jumping from lows of 20's to highs of 70+, they thrive! That plant loves this kind of weather and happily puts down roots to support blooms in a couple months.
Next, how about ranunculus? Ranunculus are gorgeous blooms, but if you plant it out in May you will never see its full glory. It wants to have its roots settled deep in the soil before it temps reach 60.
Pro tip- don't buy a cool weather loving plant when it is in bloom. Try to choose a plant with just foliage before buds are set. This will give the plants energy to focus on getting deep roots before time for blooms.
I know... I know this seems so backwards. It is cold outside and I am saying its a good time to plant?
Perennial plants are the same. If they are early bloomers they are likely cool weather plants. If you can, plant these in September. Missed September? March-April is your next best time. Just remember to water them weekly even though the weather is cold.
Think Daffodils vs. Dahlias. One likes it cold. One likes it hot. One hates hot and one hates cold.
Don't know which a plant is? There are too many to memorize. I may be able to guide you. send me an email and we will chat! 
An Ode to Wonderful...
If you were limited to one word for 10 years, what would you choose?
The first time I met my friend's mom was decades ago. I will call her Violet. The first thing Violet did was take my hand and show me her flower garden. She lived in the hot dry desert of Colorado, yet had her property blooming like a rose.
It was beautiful!
Over the years Violet showed me that she loved all things family, especially her home and garden. She wanted to make the world a better place, or at least her part of the world and did it with nearly constant service to others.
She always loved flowers and grew so many. She was compassionate, full of energy, ideas, and love of life.
Ten years ago Violet suffered a massive stroke that left her completely debilitated. As she regained strength, she was able to say one word.
“Wonderful!”
Would you like some lunch Violet? She responded with “Wonderful!”
Would you like me to read to you? “Wonderful!”
Would you like to sit up? “Wonderful!”
When my friend would bring Violet to her home everything was “Wonderful!” with a lopsided grin.
That one word drew people to her like bees to flowers on a hot summer day.
I have learned that people who love flowers are often happier. They have kind hearts and are generally thinking of how to be gracious to others.
Our friend 'Violet' lifted people's hearts by smiling and telling them "Wonderful!" to everything they said or did for just over 10 years before her body gave up.
What a legacy she left! What an influence!
Are flower people this way naturally so they are naturally drawn to the beauty of flowers, or do flowers make them this way?
I couldn't really say.
Either way, maybe we all just want our efforts to be received as Wonderful!
Flowers are like people. Each is beautiful in their own way. ~Miranda Kerr

Flowers are Essential...
We all desire peace and a bit of tranquility from the stresses of every day life. We all desire peace and a bit of tranquility from the stresses of every day life.
Did you know that Harvard conducted a behavioral research study on having cut flowers in your home?
Any guesses what the study revealed?
My guess is that if you are a flower friend of mine, you will not be surprised by these findings in the least.
The behavioral research study conducted by Nancy Etcoff, Ph.D., of Massachusetts General Hospital and Harvard Medical School, found that people feel more compassionate toward others, have less worry and anxiety, and feel less depressed when fresh cut flowers are present in the home.
I don't know about you, but these are all areas I am incredibly interested in improving.
Local flowers are really difficult to get in Idaho year round. This is why I am growing winter tulips.
Tulips symbolize Spring, Hope, and Joy.
When you add these to the Harvard study that improves Compassion, decreases worry and depression, it seems to me flowers will make the world a better place!
Want to order your flowers for this week? Here's the link to Winter Tulips!
Want to grow flowers of your own to cut and bring into your home? Sign up for my Seed Sowing Classes here.
If you are reading this May - October, maybe you would prefer ordering your Friday Flowers here.
Either way, I hope you are blessed with all the hope, joy, compassion and kindness flowers can bring you!
Does Ella June Gardens sell Wholesale to Florists?
Why yes, yes I do!
Please note that if you happen upon this Bloggish Ramblings, and are a florist, THIS POST IS FOR YOU!
For 4 years, cultivating specialty heirloom, old-fashioned and uncommon varieties of flowers for wholesalers was my main game.
Growing large quantities of blooms for florists and designers to use in their amazing design work is remains a big focus in my Gardens, however how it works continues to morph and change a bit each year.
To be able to continue selling to this elite flower market, I have had to make some changes.
** Beginning in 2025, I need to have on record both your florist license and your resalers licence before the first sale of the year can happen. **
Please email me today to get a link to the super easy Google Form for you to fill out.
Sowing Seeds in February?
Am I completely crazy? Haven't I heard that you shouldn't plant flowers or vegetables into the garden here in Middleton before Mother's Day?
Yes, I have not ony heard that, but years ago I taught it too.
Unfortunately, that is a completely wrong philosophy.
There are actually many flowers that PREFER being planted out when you have the big weather swings like we have here.
Here's a list of the top 5 flowers I always plant every February from seed with plans to have seedlings out in the garden by mid March.
#1 - Snapdragons
These beauties are flowers a cutting garden cannot do without. They are just barely able to handle our winters, so when I plant them in the fall it is a bit of a gamble. If we get extra cold one week, they may not make it. Because I always hope for those earlier blooms I still plant them in the fall, but always reseed in February... just in case I have holes I needs to put new plants.
#2 - Bachelor Buttons
Have you seen the new colors of bachelor buttons that have come out the past few years? Ahhhh!! I simply cannot get enough of this flower anymore. Although I still grow the traditional Blue Boy because all brides seem to want blue in their bouquets these days, I love the pinks! The mixes of Velvet Dawn with varying shades from eggplant to plum to almost blush really speak to my soul too and this will be my first year growing these colors.
#3 - Calendula
What is a cutting garden without this early spring beauty? Again, I am partial to the newly bred varieties. You know I like the softer colors. Ivory Princess and Triangle Flashback are two I love. They sell out quickly, so if you like the softer shades too and happen to see seeds available be sure to snatch them up!
#4 - Larkspur
Larkspur seemed unimpressive to me until I found the QIS series. These are fully double florets and bigger than what was offered to our grandmothers garden. These are not only lovely in arrangements, but their flowy nature in the garden space make them a double win in my book. 
#5 - Feverfew
I have fallen for every single variety of feverfew I have ever grown. Whether you grow the tiny daisy shape or sunny ball on multiple stems all of them are simply pure sunshine... once again both in and out of a vase.
What is extra great about these flowers is if you plant them in the garden by March, you are likely to have flowers by June!
No more waiting long into the heat of summer to have bright glorious flowers in your garden. These will grow and bloom for you so much better if you plant them out early -
I promise!
Happy Growing!
Ella
Workshop vs. Class - which is best?
The long standing debate.
Are they the same or different?
I can't speak for everywhere, but here in the gardens, I mean completely different things when I say "Class" than when I say "Workshop".
Classes at Ella June Gardens, are a passive experience. You listen and ask all the questions you want, but there are few (if any) things for you to experience and take home with you.
Basically, you listen while in the class then do it when you get home. Less prep work for me. Less supplies that need to be sourced and purchased. Shorter planning time. All this equals a big savings for you.
Workshops at Ella June Gardens are an active experience. We tour the gardens. You get your questions answered in detail. Most importantly, the workshop includes everything you need in order to do the topic of that day.
Worshops are about creating.
Floral design workshops include everything you need to create that particular design that day. (the vase, the mechanics, the flowers etc.)
Seed Starting Workshops include everything you need to start seeds as well as the knowlege behind those seeds. (the soil, containers, seeds). Some even include additional plants already established for you to take right home and plant in your garden.
These take weeks for me to prep to source and check each of the supplies that will be needed. It requires a whole lot more planning on my part to make sure you walk away with something useable or even giftable. I never know exactly how many people will want the workshop, requiring minimum and maximum numbers and costing significantly more.
So which is better for you? would you rather learn then source your own tools or have everything gathered and prepped for you?
Please email me and let me know which format you prefer.
Best Blessings,
Ella
Deepest Affection: "The Grand Gesture"
When you want to make a truly unforgettable impression, the 25-stem "The Grand Gesture" tulip bunches are just for you.
"The Grand Gesture" is the perfect choice this abundant bouquet beocmes a symphony of color and some of the tulips even have light fragrance.
It is a breathtaking expression of love, appreciation, or celebration. At $50, "The Grand Gesture" is ideal for Valentine's Day, anniversaries, birthdays, or any occasion where you want to convey your deepest emotions.
Imagine the look on your loved one's face when they receive this magnificent display of winter's finest blooms. It's a gift grown with love and joy that will be remembered long after the last petal falls.
As one of my flower friends recently said, "It's not just flowers; it's an experience."
Why Choose Locally Grown Tulips when others are so much cheaper?
- Unmatched Freshness: Here in my shop, I can harvest tulips right at the peak of their beauty when you are ready for them rather than having to pick them early to ship. This ensures the most vibrant color and longest-lasting blooms. My customers tell me all the time, "You won't find this level of freshness with store-bought flowers."
- Sustainable Practices: I am completely committed to sustainable gardening practices to ensure the health of our blooms and help the earth continue to give to us.
- Local Love: By choosing my locally grown tulips, you're allowing me to share extra flowers with our local shelters and care facilities for those that may be forgotten. Each month I have flowers, I gift flowers to someone in the community who is needing a boost. If you know someone you'd like to recommend, please pop me an email with the suggestion.
- Unique Beauty: Each tulip is unique, with its own individual character and charm. I have hand-picked each variety based on colors and shapes you may have not seen before. Each and every variety is a testament to a Grand Creator.

A little Touch of Everyday Elegance...
If you are like me, many times, it's the small things that make the biggest difference.
This is why I package Ella June Gardens tulips in various sizes. You pick the right size for what you need.
The 8-stem "A Little Luxury" tulip bunches are just enough to bring a touch of understated elegance to your everyday life.
Whether you're treating yourself to a pop of color on a dreary winter day, surprising a friend with a thoughtful gesture, or adding a touch of natural beauty to your home, these perfectly petite bouquets are the answer.
Just $20, makes it an affordable way to brighten any moment. Imagine these vibrant tulips gracing your kitchen table, adding a touch of spring to your office, or brightening the day of someone special.
There is nothing that brights a space better than flowers. "A Little Luxury" is the perfect way to say "I'm thinking of you," "Thank you," or simply, "I deserve this."
This is part of the job...
Sometimes when flower growing isn't going well, I have to tell myself that this is part of the job I chose.
I wish that flower growing was always the perfect pictures painted on social media, but it certainly isn't.
Let's talk about tulips for a minute. In my previous Bloggish Ramblings I mentioned that when tulip bulbs are used as cut flowers the math generally goes like this 1 bulb = 1 flower.
However, I realized this week that the math I did there is quite misleading. It really is something closer to 1.5 bulbs = 1 flower in the field and 2 bulbs = 1 flower when forced. Hydroponics may even be smaller margins. I am beginning to think it is 2.5 bulbs = 1 flower.
That may be a bit confusing, so let me explain...
First of all, especially when buying bulbs in bulk, many came this year that were completely rotted. They were soft and even when I carefully sorted through them about 1/3 had to be thrown away as not being a viable bulb.
That about broke my heart.
Gathering up all my courage, I moved forward with my tulip plan. This year 1/2 of my bulbs were planted outside and 1/2 of them I am forcing hydroponically.
Once bulbs are tucked into the ground, I thought they would be safe and sound for a few months until bloom time. However, so many bulbs are being found in my walk ways and grass.
We are just beginning to realize tulips planted in my gardens are being packed away by squirels and/or mice who think they are delicious.
I am fairly confident that I now have at least 25% fewer bulbs out there right now.
Also, with all the excessive rain we received overnight I have been digging trenches to guide water away from the remaining bulbs.
Bulb rot is not something we have to worry about too much in dry Idaho, but when our annual rain expectancy comes all at once, all bets are off.
So that is what's happening with the outside tulips.
Hydroponic growing is not for the faint of heart either.
I took it on knowing it was going to be a challenge. All conditions have to be just right in order to trick the bulbs into thinking they have already experienced enough Winter to flower and that it is now Spring.
One thing that I monitor closely is humidity.
Honestly, we have such a dry climate, that needing to monitor the humidity took me completely by surprise. Tulips will get either leaf topple or stem topple if they experience humidity over 90% - even for just a few minutes.
Imagine my horor to come home one day and find the humidity in my grow space had spiked to 99%.
I worked as quickly as possible to get the humidity down and soon it was well below the 90% danger zone.
At first the tulips did not look like they suffered too much from it, but now I know that 2 weeks later, their leaves began to split and some stems have caved in. The stems that were most suseptable to stem topple are not able to hold up their blooms.
So... here is the good - Winter tulips when they bloom are stunningly awesome!!
Here is the bad - It is a bit heart wrenching to see potential flowers lost so easily after so much work.
Here is the ugly - At this point Winter Tulip growing isn't looking like it will be a sustainable part of my business. I'll have to wait until May and crunch all the numbers.and it is best said by my mother when I was growing up. "We never need to go to Vegas. Farming is the biggest gamble of a lifetime."
As we witness strange Winter storms hitting all across the United States, my little flower experiment is nothing in comparison. However, it does give me a little taste of what that gamble is doing to our food farms and domestic food supply.
If you are the praying type, please pray for America. If you are not the praying type, maybe you will consider praying for America anyway.
Be Blessed,
Ella
Questions on Tulips...
There have been a lot of questions about tulips coming recently about growing tulips, and for good reason.
There is so much shown lately about growing tulips in egg crate format to fit literally 1000's of tulips in a small space to give a Holland inspired WOW factor.
But all these inspirational posts can lead to big confusion for the home gardener. Here is why...
Most home gardeners have planted small clusters of bulbs in the winter. They get to enjoy the beautiful symbol of hope in the Spring when not much has woken up yet in their garden. The traditional gardener will then leave the flowers in the garden and let the foliage die back naturally and the tulips are a bit forgotten until the following year when they bloom again.
Under these circumstances, tulips are a bit of a perennial bloomer. Plant them as directed 6" deep and 3"-4" away from any other plants, bulbs or roots. You may need to divide the bulbs in a few years but you can bet they will give you several years of flowers just like daffodils.
Pretty straight forward...
Until recently...
The confusion began in about 2018 when more Americans began growing tulips for cutflower production.
When tulips are being grown to be used as a cutflower, those bulbs don't need any space to multiply because they are being pulled right out of the ground before they are even in full bloom.
That is right. The flower, foliage, and bulb and pulled rather than cut.
Many ask, can I just cut the foliage and flowers and leave the bulb to continue to grow?
Nope. That bulb will not create a new flower without the foliage to regenerate that bloom, stem and strength to produce it.
In this situation, the bub needs to be treated like an annual. One bulb = One flower.
This is why the cutflower industry is showing all the bulbs planted so close together.
I hope this clears things up for you a bit. But you are always welcome to email me you questions.
Best Blessings,
Ella
Favorite Flowering Perennials
We are nearly 1/2 way through winter, which means it will be a great time to start planting perennial cut flowers in about 8 weeks.
Early spring is one of the best times to plant hardy perennials that thrive in our 6b/7a Treasure Valley weather. There really is no need to wait until Mother's Day to plant these tough plants.
Here at Ella June Gardens, I grow over 75 varieties of perennial cutflowers. Perennials can be a little bit of an investment on the front end, but continue to come
back year after year.
Some perennial cut flowers I have started from seed. These grow beautifully and bloom just the color I expect them too. Others come from root divisions in order to get the desired bloom color or shape.
Which ever way the perennial blooms come, they will always be worth the effort in my book. I was going to give you my top 5 favorites, but I just couldn't leave off yarrow. So here are my top 6.
6 Favorite Easy Perennial Blooming Flowers.
#6 - Yarrow - There are so many types of yarrow, that there is a wide range to choose from. I have grown only 8 different varieties, but love them all for different reasons. For a white rebloomer, I'd choose Peter Cottontail (from root divisions). For pastel mix of colors, I like the Colorado Mix (from seed). For dried flowers, I don't think any do as well as Corination Gold (root divisions) at keeping their colors.


#5 - Eryngium - What is a garden without a blue flower? These beauties are frequently found in grocery store bouquets for a reason. Their color is so rich and vivid that they make a bouquet sing... and they are quite easy to grow. If you have patience to wait 2 years for blooms, you can even grow them easily from seed! 

#4 - Echinacea - These flowers have some such a long way from just the regular cone flower our grandmother's grew. While I still love the basic coneflower shape, the specialty doubles and truffles steal my heart every single time. I think I need to grow all the colors, and there are soo many to choose from! The polinators love them. They hold up in a vase for 10+ days. They are drought tolerant once they are established. They rebloom multiple times in a season. For so many reasons, Echinacea should be on every cutflower garden's wish list.
#3 - Foxtail Lilies - O Glory. I love these tall foxtail shaped blooms. Few flowers get this tall in Idaho. They really look like something quite exotic dancing through the garden beds. They are too tall for a standard vase inside the house, but if you have a large urn, they are worth bringing a few stems in. They last just as long inside in water as they do outside on the plant. Foxtail lilies can be tricky to source and their bare roots have to be handled with a bit of care, but if you are lucky enough to get some, email me. I am happy to share tips for planting.
This design was created by Posies Floral Design. I love it because it shows how these beauties dance above other flowers.

#2 - Phlox - I went so many years only knowing about creeping phlox (the kind that work great as a ground cover. Only about 5 years ago did I discover tall phlox. The scent is light and fresh and perfectly lovely. It is a complete battle between which scent I like better peonies or phlox... I like one best until the next one blooms. I just cannot decide. These can be reblooming once they are established. Give them a couple years growing in your gardens before expecting this from them though. Warning, some phlox are prone to powdery mildew. Simply look for varieties that say they aren't and you should be fine.


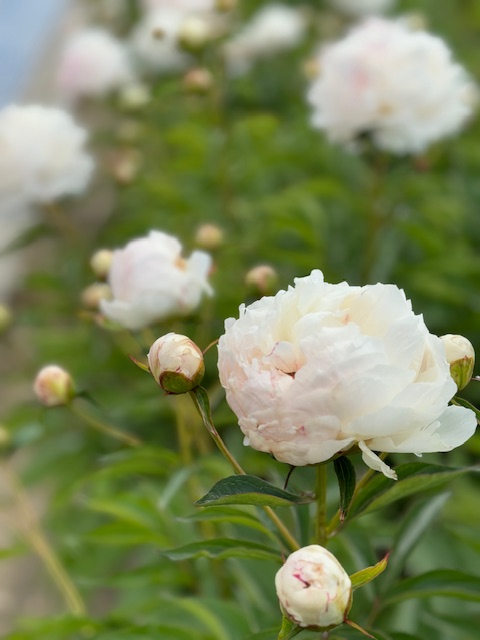
#1 - Peonies - Drumroll please for the diva of all flowers...
If you have been around me much, you know peonies will always be my favorite. The pure nostalgia. The rarity of them. Every year I try to stuff a few more roots into my Gardens. Even though they only bloom for 1-2 weeks each year, I simply cannot get enough of these. Their bomb of petals. Their exquisit scent. Their long lasting ability (some have lasted for over 100 years!) I simply cannot get enough of these. If I could only grow one perennial flower, peonies would be my choice. They are so easy to grow, that I am convinced everyone should have at least one peony in their garden.

What is the best of all this?
In the heat of summer no wedding should be without Echinacea or Eryngium.
No isle flowers sing quite like the ones who include the tall dancing foxtail lilies. They are never-to-be-forgotten.
Tucking peonies into a spring bridal bouquet or phlox into a summer wedding not only brings beauty to the eyes, but also a scent they will never want to forget.
When I can grow these stunning special flowers for a special wedding or event. That really makes my heart sing.
Best Blessings to you and yours,
Ella
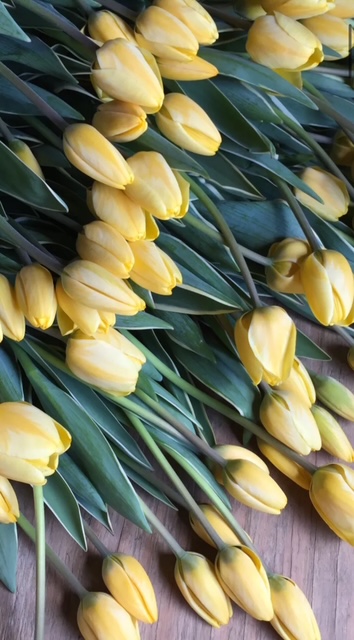
Did You Say Winter Tulips?
Yes, yes I did!
Usually when we think of tulips, we think Spring, but spring is still 12-15 weeks away.
Once Christmas is past, January usually hits us hard. Sometimes it is just the cold, dark, sadness. Sometimes we have deep sadness chasing us down and we are trying desperately to stay one step in front of.
This is exactly the time of year we need flowers in our lives the most, so with extreme reverence, awe, and pure delight I am thrilled that I have actually been successful in growing Beautiful, Specialty Unique and even some are Fragrant Tulips in my shop.
Each step of the way many things can go wrong. I have to monitor the temperatures and humidity to an exact amount. If I go above or below that, they will fail to bloom.
The hope I have is that I will have them to offer you every week when you need them the most.
If (and this is my first year trying, so it may be a Big IF) I can continue to grow them exactly correctly, I will have them each week or maybe every other week from now until other Spring Flowers begin blooming.
Bringing you a bit of joy when you need it most is my dream for this Winter.
Hope to see you on my Porch!
Ella
Should I or Should I Not DIY my Wedding Flowers
Weddings are dreamy!
With all the love exploding in your heart, filled with hopes and dreams of forever, it is pretty common to rush to Pintrest and begin your vision boards. Next you call your florist and name all the ways you want to fill your day with fresh gorgeous blooms, but then she asks you to name your budget for all your stunning ideas.
You are not alone if you suddenly think the only way you can have the wedding event of your dreams is to DIY it. But is DIY right for you?
I am here for you! Here is a quick checklist to guide you through whether or not you are up for this kind of challenge.
Just know that no matter which is best for you, or if a combination will work great, all are great options. Also, I want to reassure you that the most important element for a beautiful wedding is two people being deeply committed to love, respect and care for each other. If you've got that, you have got not only a beautiful wedding in your future, but also a beautiful life.
In this checklist, we will go over what time you have available the three days before your wedding, all the way to how familiar you are with working with flowers.
Don't you worry. You are on the right path, and will know what is right for you by the end.
I'll be here for you when you are done.
Tulips and Spring blooming bulbs
The best laid plans don't always come to fruition.
My 2025 Spring bulbs were ordered in plenty of time, but between the strikes at the East Coast port-of-call causing delays of shipments and learning all I can about forcing tulips inside during the winter months, the beautiful spring in ground plantings of tulips simply did not get done.
Then amid the frosty frigid mornings after Thanksgiving questions started coming in from others... "Am I too late for getting my tulips and daffodils planted in the ground. 
I certainly hope we are not too late! I realize the ground is frozen. Digging in frozen earth damages more than just your pride and muscles. While the earth can feel as hard as concrete, forcing it to separate can damage the integrity of the soil making it settle unevenly once it does thaw.
Let me tell you the key things I have done to make it so I can get these 2,000+ bulbs in the ground safely before the end of this year.
1. Cover the area I want to plant the bulbs with 6" of light mulch (I use leaves because that is what I have most of, but straw works just as well).
2. Cover those leaves with some kind of protective cloth. Mostly this is to keep the mulch from blowing away should we get a strong wind. (I use a frost cloth, but in the past when I have a smaller area I've used an old fleece blanket).
3. I will leave this be for a couple of days, where it gently keeps the ground above freezing and cause it to thaw.
4. After a few days, rake away the mulch and dig the needed depth for the bulbs.
5. Plant. Tulip bulbs bought from me should be planted 6" deep. If they are staying in your landscape and not being used as a cut flower, plant them 4" apart. Daffodils should be planted 4" deep and 4"-6" apart.
6. Water. Bulbs do need to be watered in when they are planted, but watering can feel a bit tricky when we are barely above freezing temperatures.
What if you are planting just as it the day is turning to night, getting darker and colder? What I have done with Ranunculus and Anemones and believe it will work just as well with the tulips is this... 
Plant one day and water in the next day when you have a couple of hours before temperatures reach that critical 30 degrees or lower.
Another option is to use the mulch again. Plant the bulbs. Water in and then cover them up with the straw or leaves again. Here is what I don't quite know yet. Daffodils (even the fancy daffs) will be fine to leave the mulch on them long term. Tulips (at least the fringed, parrot, and double varieties) typically require EXTRA cooling. This may mean that after a day or two it will be best to remove the mulch once again. It is an extra couple steps, but will allow the soil to get what it needs to support your bulbs and help them grow through the winter months.
If you like this discussion, you may want to join my flower friends newsletter where we chat about all kinds of flowers.
Join In
 Tis the Season for Giving
Many times over the years when I mention to people my favorite beverage is Cranberry Wassail, they occasionally look surprised, but usually look at me a bit strange and change the subject.
Let me just say, I've tried other recipes and agree they aren't so great, but the combination of cinnamon and orange in this one is a winner in my book!
It certainly doesn't hurt that when I begin brewing a pot of this Cranberry Wassail it doesn't take long before everyone in the family is in the kitchen. I've learned to make a double batch if I want some for later.
Here's the kicker... It smells divine, tastes delicious and is incredibly good for you. This trio is what makes it my personal beverage of choice this week through the New Year.
Stock up on your fresh or frozen cranberries, because while I would love to pop over to your house and make it for you, I have bulbs to tend to.
Instead, I am going to give you this fabulous recipe!
First, you may be interested in knowing how I found this recipe. I don't normally subscribe to any specific diet, but I did do Trim Healthy Mama diet for a while. Serene and Pearl convinced me to give this recipe a try when I was sick of all the overeating rich holiday food, so I give ALL the credit to those two sisters.
If you are like me you won't try it for the taste alone, do also for my body that may or may not be overfed with not-so-good-for-you meals this time of year. (I'll let you read up on the benefits of cranberries another time, but it is fascinating!)
While this really doesn't have much to do with flowers, I am giving you my favorite basic recipe for warm fruity goodness knowing that many people who love flowers also love good food.
Cranberry Wassail
2 cups fresh or frozen cranberries
3 cinnamon sticks
1-5 cloves
1.5 quarts water
1/4 tsp pure Stevia extract (or your favorite sweetener to taste)
2 tsp orange extract
Put the Cranberries, cinnamon sticks, and cloves into a large pot and cover with water. Place a lid on the pot over medium heat and bring to boil. Turn the heat down and simmer gently for about 1 hour. (This is when you and your family become intoxicated with the aroma)
Fit a cheesecloth over a 2 quart jar or large jug. Ladle or scoop the warm deliciousness into your filter to strain it. I usually use the ladle to gently squish things around in the filter or move the mush to allow more liquid through quickly.
Remove the filter and top off the jug or jar with very hot water.
Add the stevia (or other sweetener) and orange extract.
Stir well
Yes, it does freeze well if stored in a container that handles the freezer and thawing process.
Yes, it can be made in a crockpot
Yes, you can add orange rind if you want or other seasonings (like nutmeg)
NOTE: If you are not familiar with stevia extract it is a very condensed sweetening powder. Do not think you can use the same amount if using honey, monkfruit, or even regular sugar. You will want to taste it as you add the sweetener to get it to the right amount for you.
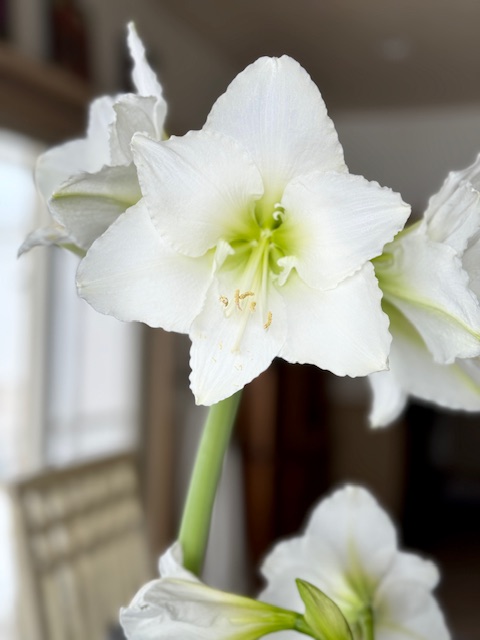
For the Love of Amaryllis
"Nothing helped my winter blues more than having amaryllis in my kitchen." ~Amy
My flower friend Amy was gifted a single amaryllis bulb from my workshop last Christmas season. Every time I ran into her, she gave me an update on how her plant was doing. She even used my instructions and had it blooming in the summer outside.
Nothing makes me happier than to hear how much joy flowers bring to people everywhere. This particular picture below was the Amaryllis I had in my own home last year. It began its first blooms right before Christmas, but this picture was taken on Easter!
Never have I ever had an amaryllis continue to put blooms on that late in the year, so I ordered the exact same jumbo sized 36+cm Peruvian bulbs again this year to see if we can have it happen again. (crossing my fingers as I write this)
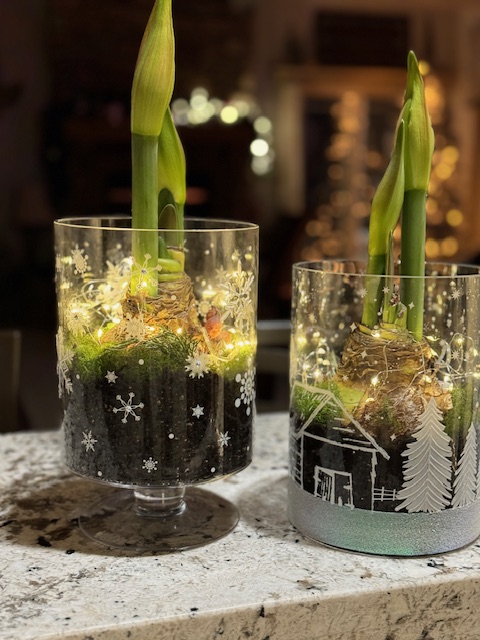
Caring for an amaryllis bulb indoors could not be easier. No matter what variety or color or size bulb you have, they all want the same 3 things.
1- Sunlight. Amaryllis crave sunlight. They are almost like little sun worshipers. They lean toward the light consistantly and stretch toward even a small light if they aren't getting what they want.
2- Warmth. Amaryllis like to be warm and thrive in the warmest and brightest place in your home. I like to keep mine in my kitchen where there is plenty of sunlight and the temperature is usually between 65-70 degrees in the winter.
3- Moisture. Amaryllis like consistant watering. It doesn't have to be every day, but don't let your soil completely dry out. When I water, I use very warm water. Not burning hot, but like a good warm shower water. This helps the bulb have an additional boost of warmth.
In my amaryllis workshop, I teach how to care for your amaryllis bulb past its flowering time so it will bloom again for you in next summer.
If you would like to chat more about flowers, we should be flower friends. Sign up for my semi-frequent newsletter here
3 of the Best Self Seeding Flowers at Ella June Gardens
Not everyone wants to have flowers self seed in their gardens. This is primarily true for me as well. Self seeding flowers can give a less organized look. They can plant themselves exactly where you hoped to have a walkway instead of the location you planned for that particular flower.
In the right environment, however, self seeding flowers are going to give you flowers with little labor or effort on your part. In my simple life I call that AMAZING. I can leave the flowers in place for just a few extra weeks while they set seed then when the conditions are perfect, they will sprout on their own.
The past 2 years I have experimented with several of these kinds of flowers and these are my top 3 that consistantly drop seed, sprout and bloom.
1 - Queen Anne's lace or Dara - These sweet girls are prolific. They want to have more lacy lushiousness in the next season's bouquets and one simple stem left to grow old will send out seed and replant an entire patch. The nice thing about QA Lace is that it doesn't seem to stray far from the location of the Mother Plant who gave them life. In my gardens I can expect them to stay within 2'-3'.
2 - Nigella or Love-in-a-Mist - I wish I had more space in my gardens to try all the varieties of these beauties. So far the Albion Green Pods and African Bride have been the most consistant rebloomers. I absolutely love these little flowers. They also stay pretty close to the Mother Plants which is very helpful where I currently have them growing.
3 - Feverfew - There couldn't be a happier surprise for me to have these reseeding around my garden beds. They do travel. One time I actually found some sprouted 60' from the Mother Plant. This was a surprise for sure! However, the great thing about Feverfew is that it let me transplant them to the location I want them. This does cause me to work a bit, but it is worth it to me to not have to baby the seedlings in my greenhouse for weeks to get them to the right size for transplanting. I have tried allowing several varieties of Feverfew to self seed and all have had similar results.
I am currently on a mission to see ifmy favorite Foxglove will reseed itself here in my gardens, but until I know how well it does I will certainly be enjoying these easy and delightful flowers.
What about you? Do you have selfseeders in your gardens? What flower do you wish would be able to self seed?
If you would like to chat more about flowers, we should be flower friends. Sign up for my semi-frequent newsletter here
The Problem with Peonies (updated)
Peonies were the very first perennial my husband and I bought when we purchased our property in Middleton almost 25 years ago. At the time I knew little about them other than the poof of blooms simply took my breath away. At the local nursery I simply had to buy every single plant they had that was currently blooming. Fortunately for my bank account, there were only 6 available.
We planted them immediatly and had a beautiful show for a couple of weeks- until they finished blooming that year. Then we did not see another bloom for 2 years.
Two entire years...
Even though the plants grew thick and pretty foliage each spring, no blooms appeared. I honestly thought something had gone terribly wrong, so I started asking questions.
This is when I learned the true problem with peonies.
The problem isn't that they are:
* Too big and fluffy
* Too sweet
* Too many varieties and colors to choose from
No, the problem with peonies is that even though they will grow for more than 50 years if taken care of properly, they simply do not like to be moved or transplanted.
Don't get me wrong. It will not kill a peony to be transplanted. However they will frequently focus on putting on roots for a year or two before they begin blooming again.
NO BLOOMS??
The big bodacious blooms are the entire reason we grow these tough plants, but in reality this plant looks to the future. To give those blooms for decades to come takes a lot of energy and energy comes from their roots and shoots. Before I tell you how to improve your odds of getting blooms the first year or two after planting, let me tell you a pit more about the peony.
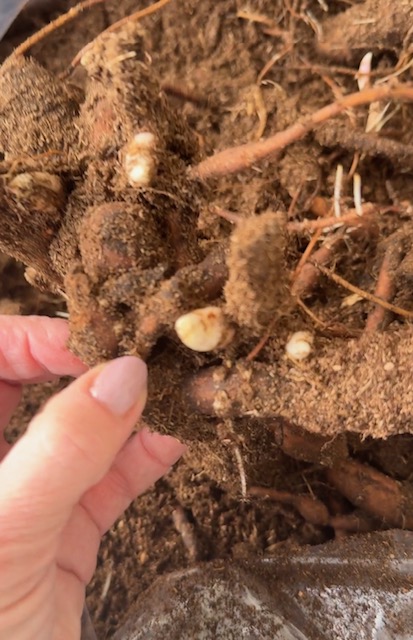
On a root in the fall you will find little white or pink nubs called "eyes". Each eye represents the probable number of shoots or stalks that will grow in the spring.
When you buy a plant at a typical nursery or store, they may or may not tell you how many eyes the root has. Typical is 2-3 eye. If you are buying through a reputable local nursery, it may even have 3-5 eyes. Rarely, but in extra special times you can find a 6-8 eye plant. These will probably give you flowers the first year!
More shoots in the spring = more energy to create and grow deep foundational roots. So typically, the larger the root, the more likely you are to get flowers.
Typically anything less than 5 eyes, the plant will focus on making more roots and eyes for the next year rather than putting up blooms.
Knowing what I know now, I must have purchased plants with only 2-3 eyes. This made the plant take 2 years before enough energy was provided to the roots for it to safely produce flowers.
Once those initial plants started blooming, it was simply spectacular! They have almost always been perfectly on schedule for the second week of June each year. I couldn't love them more.
So I dig and divide my roots to make more plants and this year I am buying more colors. :)
I am running out of spaces to put these beauties, so this is the first year I am sharing my peony roots. I'd love to hear from you. Now that you know about the problem with peonies and root sizes,
Do you pay extra to have blooms the first year?
Or do you get a good price and have patience?
Fall of 2024 I will be selling large bareroot Shirley Temple peony clumps that don't easily fit into a pot.
Any smaller roots available will be put in pots to sell next Spring.
Whatever the size you plant, here is some basic care information...
Care information:
• Plant in full sun with the eye 1" below the soil level.
• Give a good deep watering right after planting and whenever the soil is dry. (approximately 2x per week through the growing season)
• Fertilize plants in May and the end of July
• Grows 24”-30” wide and 32”-36” tall
• Cut and remove foliage in the fall after first frost
If you like this, you may want to join my flower friends newsletter where we chat about all kinds of flowers.
Join In
Planting bareroot peonies are my favorite way to give them a head start, but it can be a bit intimidating.
Here are a few tips for bareroot planting.
Peonies like to be in dirt. Sitting outside of the soil's protective barrier could cause the roots to get a bit stressed.
To wake them up and get them ready to settle in through the winter, here are 5 easy steps I follow when planting bareroot perennials.
1. Soak the roots in cool water (not warm) for 20-30 minutes
2. Dig a hole the size of the root in a location that gets at least 6 hours of sunlight per day.. Make the hole wide enough the roots won't have to bend to be in the hole and 1" deeper than the root.
3. Place root in the hole.
4. Add potting soil, compost or fertilizer to the hole.
5. Backfill the hole so the entire root is covered with about 1"-1.5" of soil (no more than 2" or you won't get blooms for a couple years).
Caring for your planted Peonies
Peonies are fairly low maintenance plants, and like I have said a million times they want to live many long years. Some have been known to live over 100 years. I don't plan to live long enough to find out if these last that long, but I would love to be able to grow them long enough for my grandsons to have one when they buy their first home.
To get long lasting peony plants, here are the 5 steps I follow...
1. Grow your peonies in full sun, or at least in a location that gets more than 6 hours of sun. This makes them put on more blooms!
2. They like regular watering at the roots throughout the growing season. But don't have them sitting in water. (when you first plant them, the roots are small, so watering them in the winter when the soil is dry will help them be ready to go in the spring)
3. Fertilize in May and July when they are most actively growing or putting on new eyes for next year. (If you put compost or fertilizer in the planting hole, you can skip this step!)
4. Don't cut flowers off the plant the first year. The roots grow from sunlight on the leaves, so give it a boost by not cutting its leaves the first year.
5. Cut back the foliage after the first frost each year and remove it from your gardens.
What about Diseases?
Peonies are genneraly not prone to many diseases or pests.
However, grey spots on Peonies leaves or stems is generally a sign of botrytis. They can begin forming mid July.
The first time I noticed it on my peony plants I was shocked that the plants I diligently cared for could have some kind of fungus growing on them.
Fungicides, herbicides or pesticides are not something used in my Gardens - even organic ones if I can help it. So the horror of having an obvious sign of disease sent me to figuring it out.
I spent weeks studying it and I admit the information I read was more than a bit confusing. Then I remembered Fall Cleanup.
Cleaning up the flower beds in the fall has always been my husband's favorite time to do it. That year, after the first frost, we started with the peony plants first. Rather than composting the leaves, we put those babies right in the dumpster.
The next spring, the plants were plenty healthy without any sign of the nasty botrytis... until early autumn. That blasted fungus was back again. so we dealt with it the same way.
For over 20 years we have been dealing with botrytis the same way without it damaging the peonies or spreading to other plants.
Our process is simple...
1- Cut back the foliage to the ground after the first fall frost.
2- Remove all foliage from the gardens immediately. Do not compost leaves or stems with botrytis.
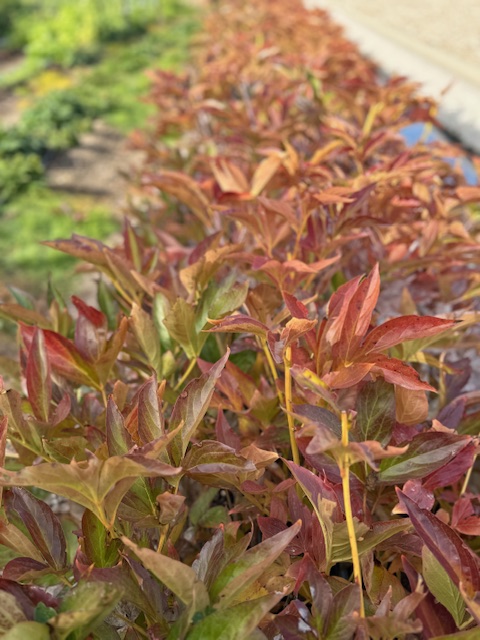
Peony plants are super long lived perennials. It is my goal to have them last for generations to come. The gray spots may be noticeable in the Fall, but the plants will ultimately be fine if you get that old foliage removed before spring.

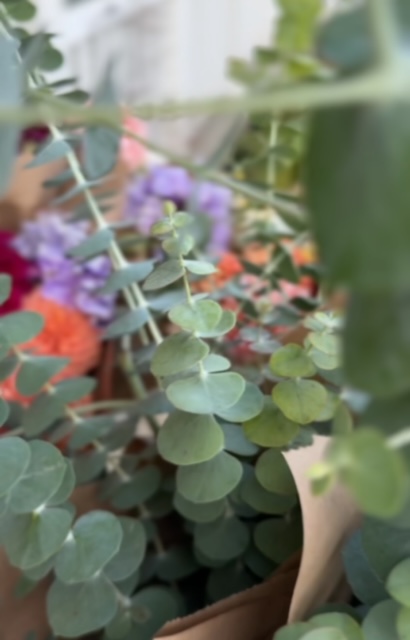
Overwintering Eucalyptus in Treasure Valley Idaho zone 6b-7a
Eucalyptus plants along with the blessings and troubles that come with overwintering it has been a year in the making.
These precious seeds were located from a farm deep in Austrailia back in August 2023. Once they arrived, I had little hope they would survive their first winter, but surprise of all surprises, those tiny seeds not only sprouted by November, they began to grow. I was left with hundreds of plants that my tiny gardens could not support, so I offered these 6"-10" seedlings to other brave souls in the Valley who wanted to give growing them a try.
Before we get into the overwintering process I plan to do, let me talk about how the way I have grown them.
The seedlings I kept for myself were split up into three groups to see how they fared in various environments.
The smallest group stayed in pots smaller than 7" in my greenhouse in warm conditions where I could make sure they were watered daily and received consistent babying and care.
The second group also remained in the greenhouse with the same careful protection, but were given large 3' wide and deep pots to grow in.
The third group was the largest group by far. Over 100 plants were placed outside in a newly created bed in a back garden that used to be a chicken run. I mention this because there was probably residual fertilizer that didn't exist in the other two scenarios.
Five months into growing these seedlings on has given very different results.
Group 1 was the least productive. The plants never grew more than 14 inches tall. They were spindly and struggled with gnats which I treated weekly with Neem oil. I will not be protecting these plants through the winter.
Group 2 in the large pots grew much better. They actually have a bit of bulk and height to them. Although they are not large enough to cut from, I will be cutting back their central stem and covering through the winter and keep them inside the greenhouse with minimal supplimental heat.
Group 3 I would call a Blazing Sucess! These plants seemed to thrive in their new garden bed. They are easily between 36"-48" tall with quite a bit of bulk to them.
These have produced so well that I have been able to share stems of fresh cut Eucalyptus with it's glorious fragrance with fellow eucalyptus lovers. There are still a few bunches available (as of October 14, 2024) and can be purchased here.
This Group 3 will get the most protection and attention through the winter in hopes of having even more fantastic eucalyptus to share next year.
This is the process I plan to use.
1- Top all main stems down to 6" above the ground. There may be some side shoots that are lower than this 6". I have read that this can be useful to the plant come Spring, so I will leave them on.
2- The entire bed will be covered with leaves.... many leaves... multiple inches of insulating leaves to protect the roots during any hard freezes we receive over the next 7 months.
3- To keep the leaves in place, I will be covering the entire bed with agribon fabric. This allows both rain to filter through as well as snow to melt and nurish those little plants.
4- Come Spring, once all danger of frost has finished and the ground has warmed more than 50 degrees, I will remove the fabric and leaves and check for the progress.
The rest of the story will have to be told this coming Summer in 2025. I am as curious as you are to see if there will be continued success for these glorious plants to survive in our mild, but occationally harsh Winters.
Thanks for following along on this journey!
Best Blessings,
Create your own lovely Bouquet
If you love dahlias, you know their time with us is short this time of year.
Cold weather makes their leaves and flowers turn brown. The plant may look dead, but if you dig beneath the soil you will find a tuber that is very much filled with all the life to give more blooms next year... but growing dahlias can be a discussion for another day.
Right now, I want to discuss some of the best ways I have learned to design with the gorgeous flowers. a bowl full of dahlias looks opulant and luxurious. Because these marvelous flowers can stand on their own, you may or may not want to add foliage. I am a self proclaimed foliage lover. I love the wispiness that lends to me feeling like I have taken a trip to a English country villiage. Anyway....
Here are my top 3 tips.
1- Choose colors that either compliment eachother or are similar hues and saturation. (Colors are deeply personal, so whatever you choose will be unique to your likes) I like to chose colors that are on the same side of the color wheel.
2- Choose dahlias of differing sizes or shapes. If you really like one particular dahlia, perhaps choose the most of that one. I love the idea of the the 3, 5, 8 rule, but you will see in my example that I don't necessarily follow it. Bouquets using a 3, 5, 8 rule have three of the largest size flower. Five of the smallest size. Eight of the favorite. Play around with it and share pictures by tagging me on FB or Insta.
3- Vary the height of your flowers. Fitting those large blooms all at the same height can make some of those beautiful faces get smooshed. Give each bloom room to breathe a bit by making them at different lengths. I love it when I see implied lines created with round flowers. It takes a bit of practice, but once in a while the implied line points directly to where you want all viewers or passersby to look.
Good Luck as you create your own dahlia centerpiece or bouquet to share with a friend, family or simply for yourself to enjoy.
Flowers bring joy and smiles so go out and enjoy yours today!
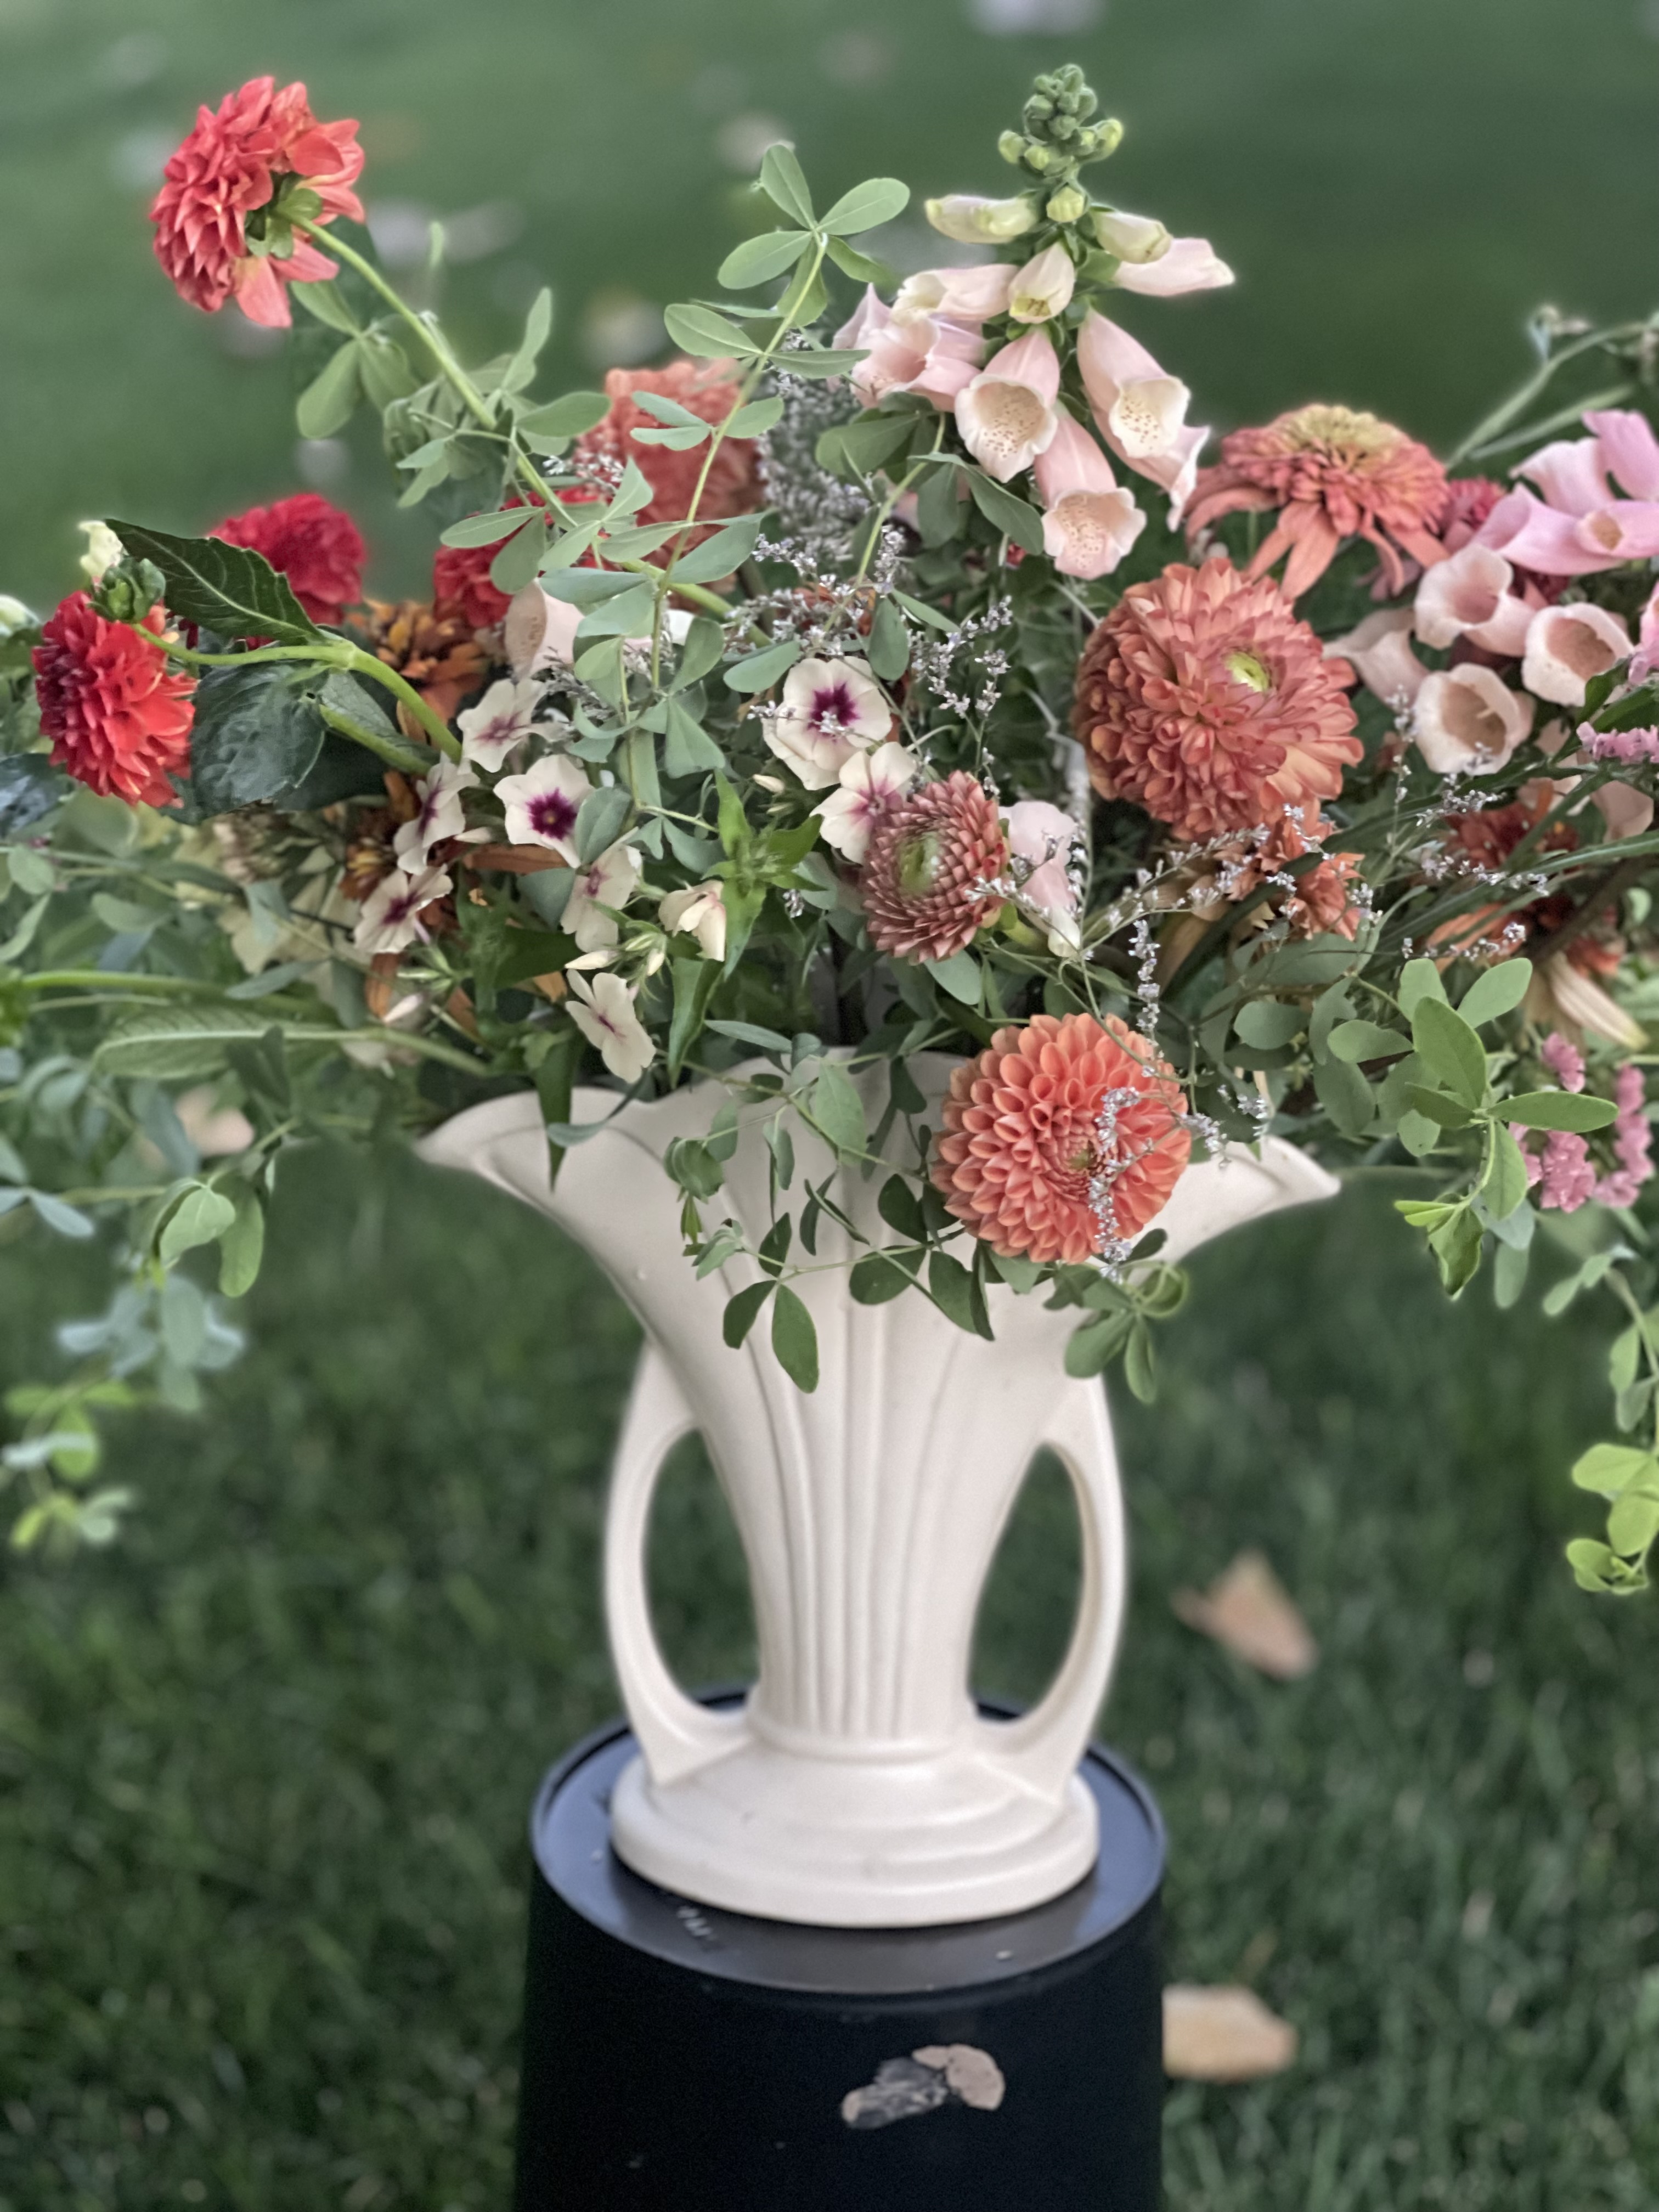
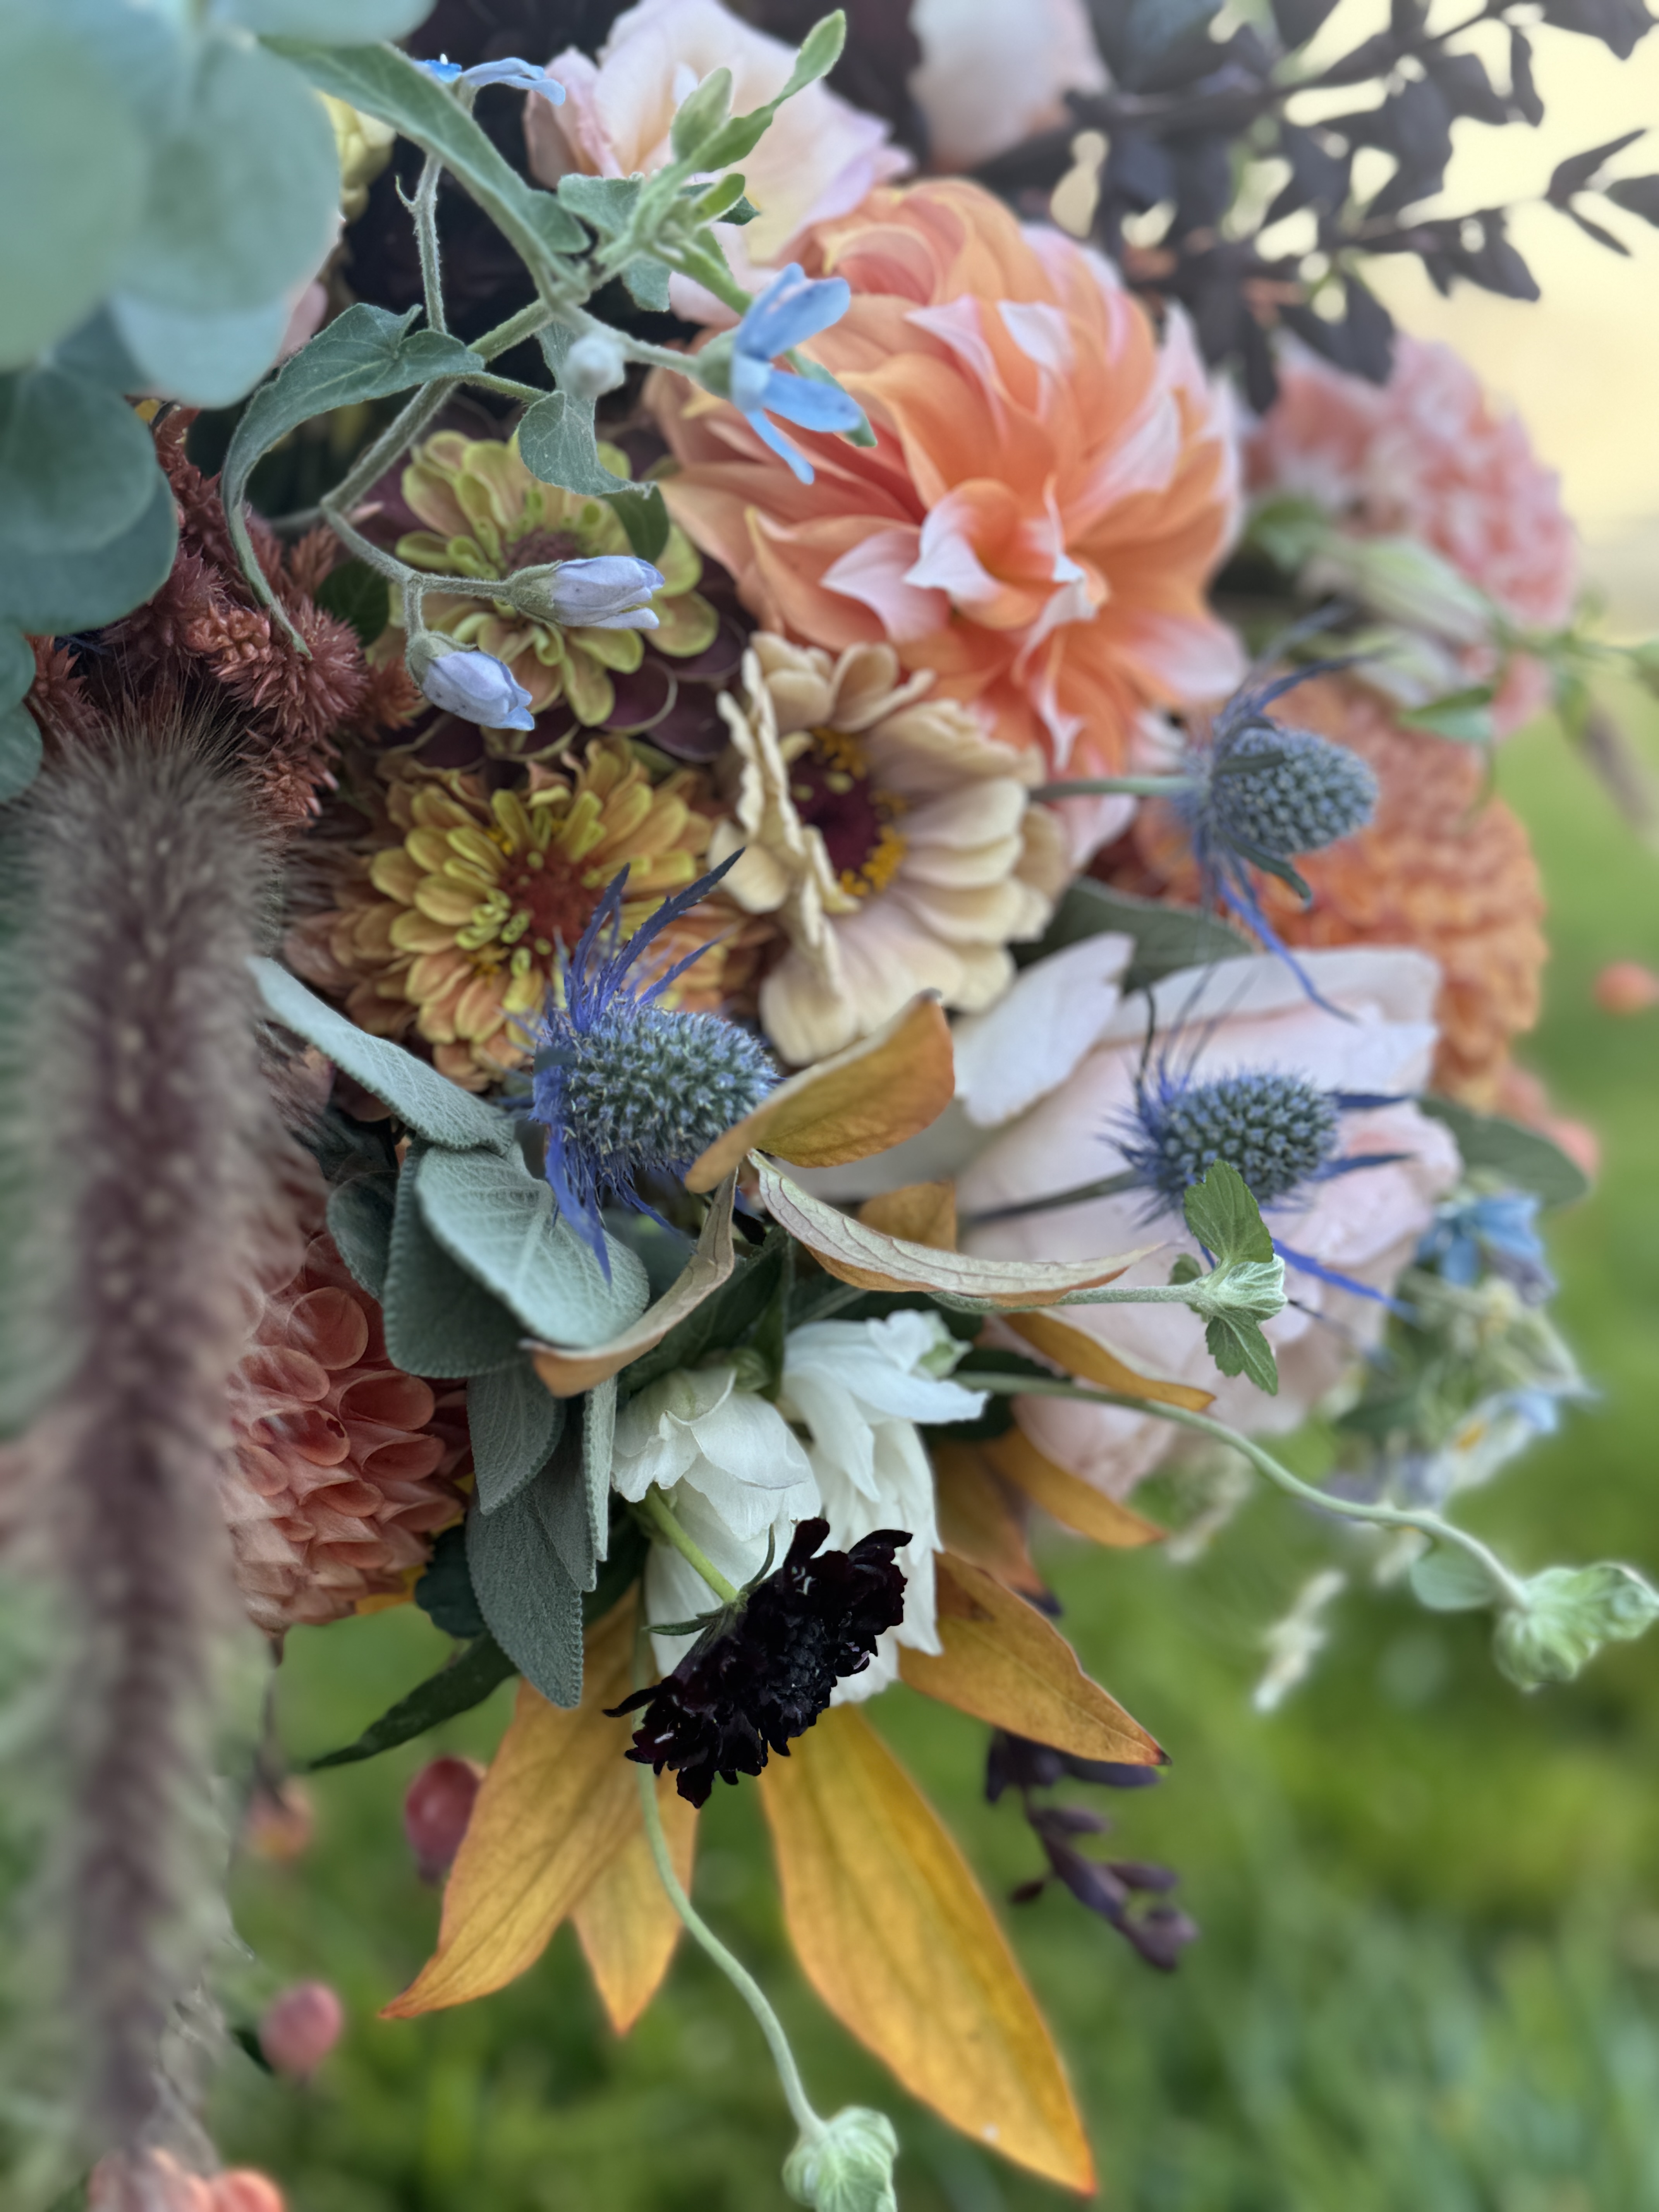
Sunset Bridal Bouquet
The end of Spring a bride reached out asking for an elopement bouquet and boutonniere for the end of September. She wanted bold rich blend and hoped for sunset colors.
In May my mind is generally on soft pinks and pastels. Her rich palette of oranges, burgundy, blush with a touch of blue was absolutely inspiring to think about. Fortunately, she gave me plenty of time to do some research.
When given more than 6 months notice for wedding work, I try to grow at least 2 special flowers just for that bride's special bouquet. The richest sunset colors to her bouquet was going to get 3...
1- A perfectly blush rose that had a deep yet soft clove scent that just happened to have the same name as the bride's deceased mother.
2- A tricolored peachy orange blush dahlia.
3- A salvia with the deep rich burgundy maroon hue
With these three growing strong, I felt confident her personal bouquet as well as her DIY Buckets when the time came.
This past week all growing and planning came to fruition. The flowers grown specifically for her were glorious. The additional flowers grown were looking good dispite the quick swing in temperature the week before.
I cut and processed the flowers the day before needed to design with them and they all looked fantastic. Never did I expect to love this bouquet like it do. It turned out to be my favorite bold colored bouquet to date (which is why I decided to blog about it!)
Take a peak and let me know if you like it too...
Join In
So many of our customers say, "Fresh flowers just make me happy!"
I couldn't agree more and are so happy you feel the same!
Join in as we create a local flower loving community right here in the Treasure Valley.
Be the first to know when your favorite flowers are available!
Get flower tips.
Get discounts.
Be the first to know when workshops are open.
Join Us!
